Features and Overview of iProcurement
- Web based applications allows organization to perform purchase activities
- It’s a self-service application module which enables buyers raise and work on requisitions and corresponding tracking
- Web based shopping interface for goods and services including requisitions for temporary rate based labor
- Complete Catalog and Contents management
- Online Approvals management
- Streamlined order placement in integration with Purchasing
- Streamlined with Sourcing to complete the RFQ negotiation cycle
- Complete Order Tracking
Procurement Process in iProcurement
- Process
- Enter Requisition online using catalog form
- Workflow Approval
- Buyer Creates Purchase Order
- Supplier Notified and delivers directly to requestor
- Record Receipt in iProcurement
- iProcurement Process Flow in Oracle
- Ordering
- Requisition
- PO
- Receiving
- Analysis
- Payment
- Supplier Performance
- Sourcing
- Supplier Management
- Negotiations & Awards
- Catalog Content Management
Why switching to iProcurement
Issues in conventional procurement systems are
- Lack of procurement information
- Minimal coordination of common purchases across organizations
- Scarcity of formal contracts(Only available are BPA and CPA)
- Large complexity like more people involved
- Lack of standardized process or systems
Benefits of iProcurement
- It provides an intuitive web interface
- Goods and services can be found easily and added to the cart like any other online shopping portals
- Streamlines Order Placement – Shopping
- Shopping List
- Multiple Shopping Cart
- Copy orders
- Service Requests
- Non Catalog Requests
- Automatic Document creation
- Centralized Purchasing
- Streamlined Order Placement – Delivery
- Inventory Replenishment Requests
- Streamlined Order Placement – Billing
- Procurement Card purchases for Catalog orders
- Oracle project integration
- Multiple Account Distributions and Account generation workflow integration
- Streamlined Order Placement
- Notes – Additional Item information, Upload & view attachments
- Approvals – Approval routing configuration and Vacation scheduling
- Review/resubmit and Cancellation
- Desktop receiving
- Requestor can receive and confirm receipt of requested goods and services directly in iProcurement
- iProcurement can automatically record the receipt transaction
- Streamlines employee ordering
- Enforce purchasing policies
- Reduces procuring costs
- Easy to upload and view additional information
- Search product internally or from external sources
- Automatic document creation
- Center led procurement process
R12 Enhancements
- New Approval types
- New user-interface options
- New option for creating and maintaining favorite lists
- Unified catalog architecture
- Better catalog authoring capability for buyers, supplier and catalog administrators
- Tolerance based change request routing and Approval
- Content security enhancements
Integration with other applications
- Oracle Purchasing
- Oracle Payables
- Oracle Inventory
- Oracle Projects
iProcurement in P2P flow
- Setups
- Jobs
- Positions
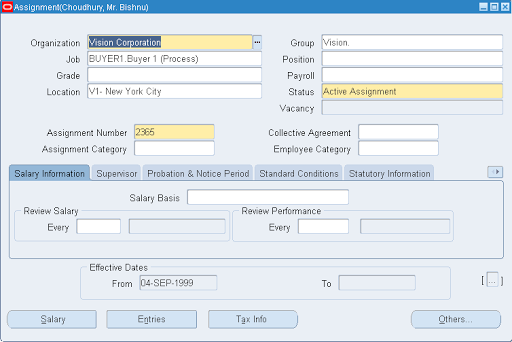
- Employees
- Hierarchies
- Approval Groups
- Assignment sets
- Item categories
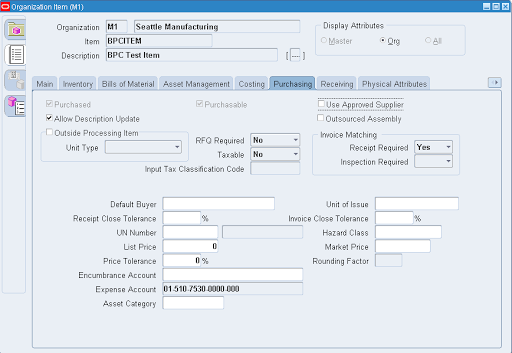
- Buyers
- Purchasing/Financial/Receiving options
- DFF for Item Categories
- Define Information templates
- Define Realms
- Setup Attachments
- Setup Profile options
- Enable Function Securities
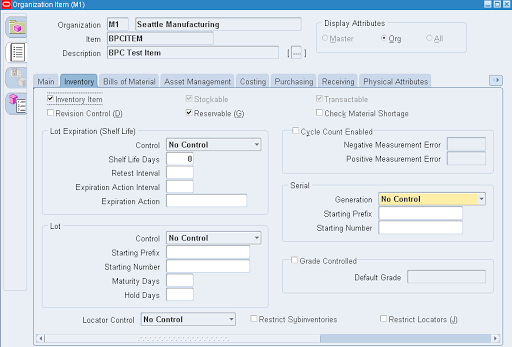
Item Availability in iProcurement
- Internal Catalog: Items assigned to categories enabled for iProcurement
- External Catalogs: Managed by supplier/Third Part or Self-managed
Flow
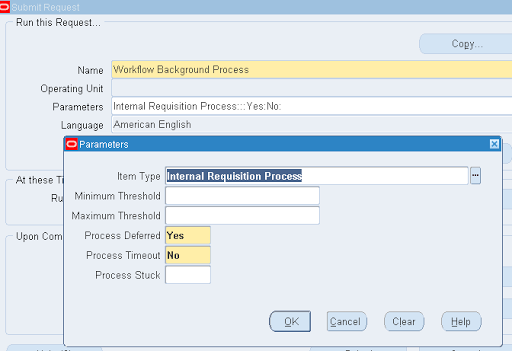
- Requisition Creation
- Requisition Approval
- PO creation and processing
- Shipment of Goods
- Receiving of Goods
- Invoicing
- Payments
Note: underlined steps can be done in iProcurement, for others EBS integration needed with respective modules
Core features of iProcurement
- Catalog Management
- Shopping
- Checkout
- Requisition Tracking and Management
- Desktop Receiving